Trezor Login: Full Setup Guide for Beginners and Pros
If you're new to cryptocurrency or upgrading your wallet security, this Trezor Login: Full Setup Guide is the perfect starting point. Whether you're using a Trezor Model One or Model T, this guide walks you through the login process, wallet setup, device management, and advanced features — all in one place.
Why You Need This Trezor Login: Full Setup Guide
Security in crypto is not optional — it’s essential. This is why a secure hardware wallet matters, and this Trezor Login: Full Setup Guide helps ensure that your setup is airtight from the beginning. Logging in to Trezor isn’t just about access; it’s about safeguarding your assets from phishing, malware, and bad actors.
What You Need Before Following the Trezor Login: Full Setup Guide
Before diving into the steps in this Trezor Login: Full Setup Guide, make sure you have the following ready:
- A Trezor Model T or Model One device
- A computer with USB port and an up-to-date browser (Chrome or Firefox)
- Access to https://trezor.io/start
- A secure environment (no public Wi-Fi)
- Pen and paper for your recovery seed
Having these basics covered will make the rest of the Trezor Login: Full Setup Guide much smoother.
Step 1: Visit the Official Site — Trezor Login: Full Setup Guide Begins Here
Start by heading to trezor.io/start — this is your official portal to kick off the process. As emphasized throughout the Trezor Login: Full Setup Guide, never use third-party links. Bookmark the page to avoid phishing scams.
Once there, download Trezor Suite, the official application used to interact with your device, perform wallet operations, and — importantly — complete the Trezor login.
Step 2: Connect Your Device — Trezor Login: Full Setup Guide in Action
Now we get to the meat of the Trezor Login: Full Setup Guide. Plug your Trezor into your computer using the supplied USB cable. Your computer should automatically detect it.
Trezor Suite will prompt you to install the latest firmware. This is critical for functionality and security — you can't skip it if you want to follow the Trezor Login: Full Setup Guide correctly.
Step 3: Create a New Wallet — Crucial Stage in the Trezor Login: Full Setup Guide
After installing firmware, you’ll be asked to create a new wallet. This is one of the most critical parts of the Trezor Login: Full Setup Guide, because your wallet's entire security hinges on the recovery seed you’re about to receive.
- You’ll be given a 12 or 24-word seed phrase.
- Write it down on paper — never store it digitally.
- Verify the words by re-entering them when prompted.
This seed gives you the power to restore access, and anyone with it could steal your funds, so take this part of the Trezor Login: Full Setup Guide seriously.
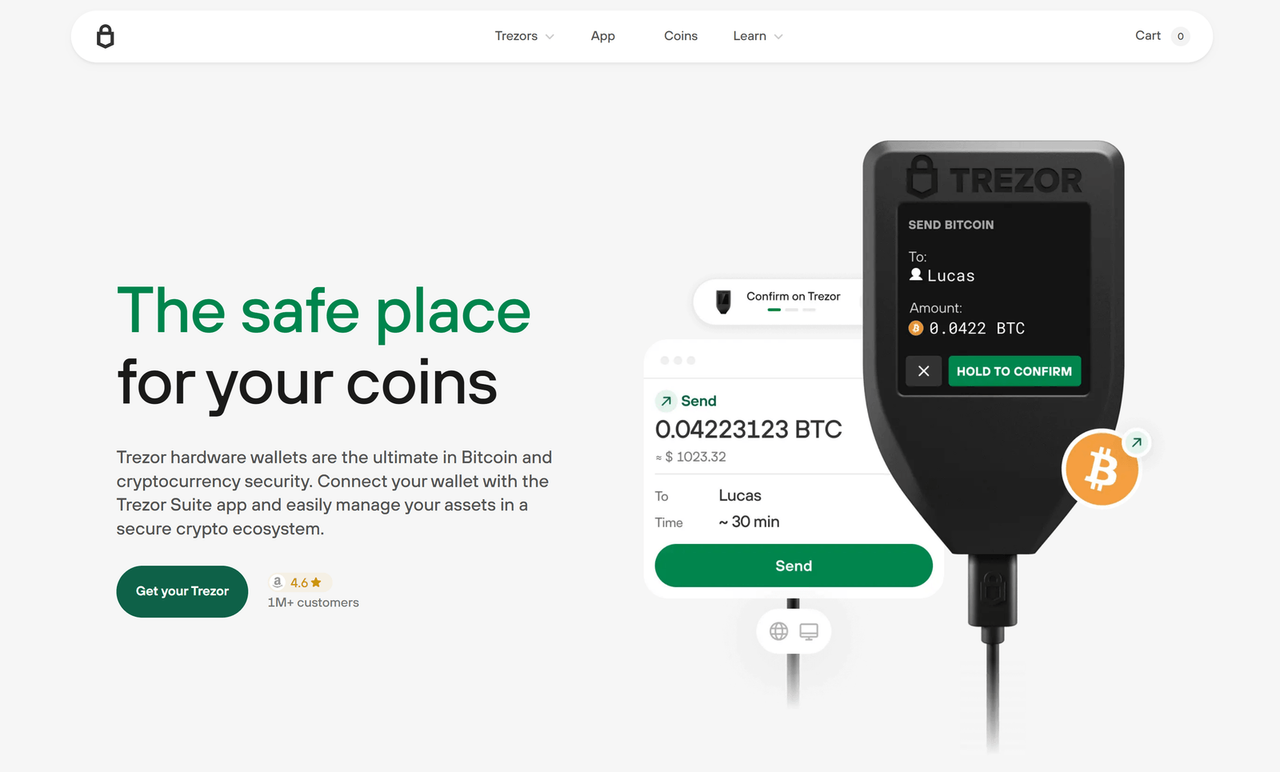
Step 4: Complete the Login — Final Phase of the Trezor Login: Full Setup Guide
Now that your device is initialized and a wallet is created, it’s time to use the Trezor Login: Full Setup Guide to access your crypto dashboard.
Login Process:
- Open Trezor Suite.
- Plug in your Trezor and enter your PIN code on the device (not the keyboard).
- Choose your wallet if you have multiple.
- You’re in!
Congratulations — you’ve completed the Trezor Login: Full Setup Guide and are now securely inside your wallet.
Troubleshooting Common Issues — Trezor Login: Full Setup Guide Fixes
Even the most secure systems aren’t immune to hiccups. The Trezor Login: Full Setup Guide includes a few common problems and how to fix them:
- Device not recognized: Try another USB port or replace the cable. Restart Trezor Suite.
- Bridge error: Make sure Trezor Bridge is installed and running. Reinstall it from trezor.io if needed.
- Firmware update stuck: Reboot your Trezor and use a different computer if necessary.
These simple steps usually resolve most issues, keeping your Trezor Login: Full Setup Guide experience smooth.
Advanced Features You Can Use After the Trezor Login: Full Setup Guide
Once you've completed the Trezor Login: Full Setup Guide, a whole suite of features opens up for you:
- Labeling with Dropbox integration: Add notes to transactions.
- Hidden Wallets: Add a passphrase for an extra layer of access.
- Staking: Use third-party platforms that integrate with Trezor.
- Third-Party Wallet Support: Connect to Electrum, MetaMask (via Trezor Connect), or Exodus.
These features aren’t necessary to complete the basic Trezor Login: Full Setup Guide, but they elevate your hardware wallet experience if you choose to go further.
Trezor Login: Full Setup Guide for Mobile Users
While Trezor Suite is currently desktop-first, the Trezor Login: Full Setup Guide also offers some tips for users on mobile:
- Use Android with OTG support to connect your device.
- For iOS, functionality is limited, but wallet watch-only access may be possible via apps like Watch Wallet.
Mobile integration isn't perfect yet, but the Trezor Login: Full Setup Guide is evolving with the ecosystem.
Final Tips — Wrapping Up the Trezor Login: Full Setup Guide
To recap, the Trezor Login: Full Setup Guide is designed to make the entire process secure, efficient, and beginner-friendly. Here are some final tips:
- Backup your seed in a fireproof, waterproof location.
- Keep firmware and Trezor Suite updated.
- Never share your PIN, seed, or passphrase, no matter the situation.
- Always verify you're using official websites and software.
By following the Trezor Login: Full Setup Guide, you’ve taken a huge step toward serious crypto security. Stay consistent, stay alert, and your crypto assets will remain safe and accessible.